Hi, I’m Jorge Amengol, a fresh graduate student of the Game Development - Advanced Programming course at Fanshawe College, Canada. I started this series of posts to register my own progress throughout the program and also serve as a reference for me on important subjects in the future. Though it is a personal record, you might find the subjects discussed here useful. Feel free to make comments at the end of each post.
Introduction
The biggest challenge in the Game Development – Advanced Programming (GDP) course is no doubt the Fanshawe’s Game Jam. This event is at the same time a final evaluation, a kind of a competition and a self-presentation to the Game Industry of what us, as Game Programmers, have to offer to the market and to possible employers.
Since the beginning of the program we have been looking forward to this day, but at the same time scared by it. I’m very glad that my presentation was very well received by the people that attended the event and for me it was an real challenge to put it all together.
In this post and the next one, I will try to describe the Technical Aspects that I have implemented on my Game Engine to make it a Graphics Technical Demo for the occasion. But before we dive into “my things”, let me briefly explain the overall format of the Fanshawe’s Game Jam.
What exactly is the Fanshawe’s Game Jam?
The so called Game Jam is in fact an evaluation for three main courses of the Fanshawe GDP program: Graphics, Game Algorithms & Gems and Animation. However, this final project also accepts, as implemented technical aspects, other subjects studied along the course as Artificial Intelligence and Game Physics. In other words, everything that would make sense for a Technical Demo from a Game Engine point of view can be considered towards the final score of the project.
This event is schedule usually to the last week of classes and is held in a room with a big TV set (for the presentation) and around 20 judges, all of them from the Game Industry. Each student will have the chance to “show off” their skills via a Game/Technical demo that will be evaluated by the judges. They will also make technical questions about the presented work. So, there is no walk in the park here, we do have to know our stuff.
Each student, one by one or in small groups, has 8 minutes to present the project and answer technical questions about it like: Wow did you do that? Why did you do that way? Why did you choose that approach over the other? Etc.
At the end, they evaluate our projects based on the technical aspects that we have presented and give them a mark between “Super Easy” to “Super Hard” for each evaluated item.
Technical Aspects
For the Game Jam I presented these Technical Aspects:
- Day/Night Cycle and Environment Control
- Shadows
- Multilayer Textures
- Scene Control
- NPC mini system
- Deferred Render – Old-film effect
- Physics with Bullet
- FOG effect
Keep in mind that the “Technical Aspects” are things that the student want to “show off”, however there is an entire Game Engine that each student has to develop by him/herself during the course with hundreds of simple and others not so simple technical aspects that are the core of the Engine itself. For instance, my presentation wouldn’t be possible if before I have not built a Game Object system, a Camera System, an Animation System, a Character System, an AI system, a Sound System, a File Loader, a Physics Integration and the list can go on and on.
Let’s now take a close look at my Game Jam project.
The Scene
Although the scene per se was not included in my “technical things”, it is, for obvious reasons, a key aspect of the presentation. There is no presentation without a scene to show it.
After the last midterms, two weeks before the Game Jam, I started to look for assets and ideas for my Game Jam. Finding good assets, like 3D models, animations and textures can be really difficult, especially because the course is mainly about Programming. Even when we find good quality material, they probably still need a lot of work to put together, like texturing, format conversion etc. For the Game Jam, the starting point for me was the Unity Asset Store. There are tons of free assets there, and as Unity uses FBX files for their 3D models and animations, as soon as you install an asset it is relatively easy to go though its files and chose the ones you want. However, you generally have to use another 3D software, like MeshLab, Maya or 3DS Max if you want to do some modifications like in the texture mapping etc. Because my previous experience as a Flight Simulator Developer that was not a difficult task for me though.
Searching in the Asset Store for some kind of “Environment” solution I found the Make Your Fantasy Game – Lite, an excellent and free package:
 Make Your Fantasy Game – Lite
As you can see, the scene looks gorgeous. However, this is a screen shot from the Unity Engine. Much work had yet to be done in my Engine to get similar results. At that point my Engine didn’t have Shadows, Fog, Gama Correction, Glow, Bump/Normal maps, multilayer textures and even the specular wasn’t looking right. Everything that was missing had to be implemented, together with the Game Jam, in about two weeks. This might sound like a lot of time to a Professional Graphics Programmer, but keep in mind that less than 8 month ago we were learning how to draw a simple triangle on screen. For a newbie, this is really too much stuff I guarantee.
A Graphics Programmer is also an Artist
I don’t like the line that people usually draw between Programmer and Artists. Of course, most of the time each one will be concentrated in his/her area of expertise, but in the Game Industry, an Artist that knows nothing about programming and vice-versa has some limitations that can impair a lot of his work to achieve higher levels. In my case I was blessed to be able to have worked as an Artist before for some time, doing Flight Simulator airports and animations. So, building my Game Jam scene and the attention to how the things were blending together visually were actually very enjoyable.
After I have chosen the right set of assets to use, I had to go though a lot of steps to put everything together in the Engine. The nice scene you can see in the last topic is in fact several different 3D objects already positioned in Unity Engine. There was no simple way to just copy these positions to my scene, so I put everything together in a 3DS Max scene to be able to mimic the “Graveyard” by hand-positioning every 3D Model and than exporting them as OBJ files to my engine.
The process looked like this:
- Import the Assets individually from the FBX file;
- Look for their textures in different folders;
- Group them by common textures, to be able to export some as groups of objects (Draw Calls Optimization);
So, after this process, the 3D Max scene looked like this:
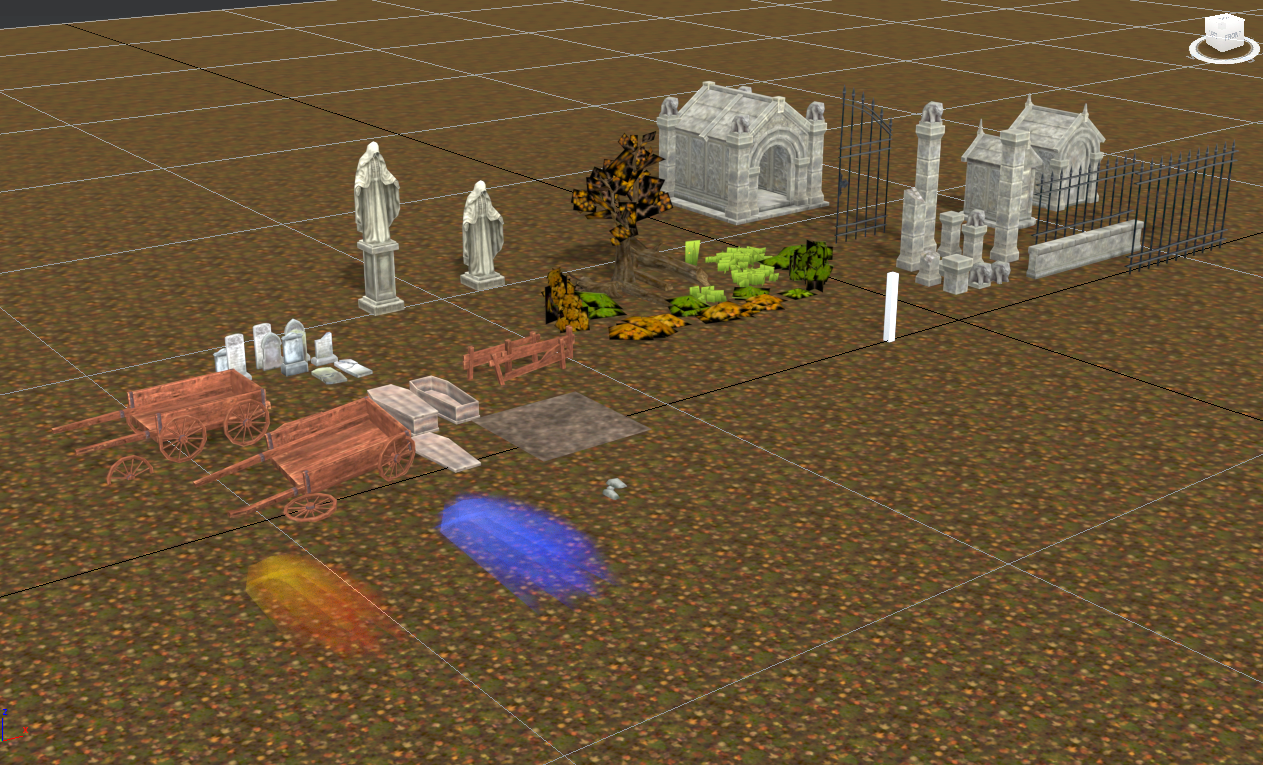 The collection of assets in 3D Studio Max
Now it was time to starting building the scene. The first thing I did was making the limits of the scene. I put together same fences, gates and concrete elements:
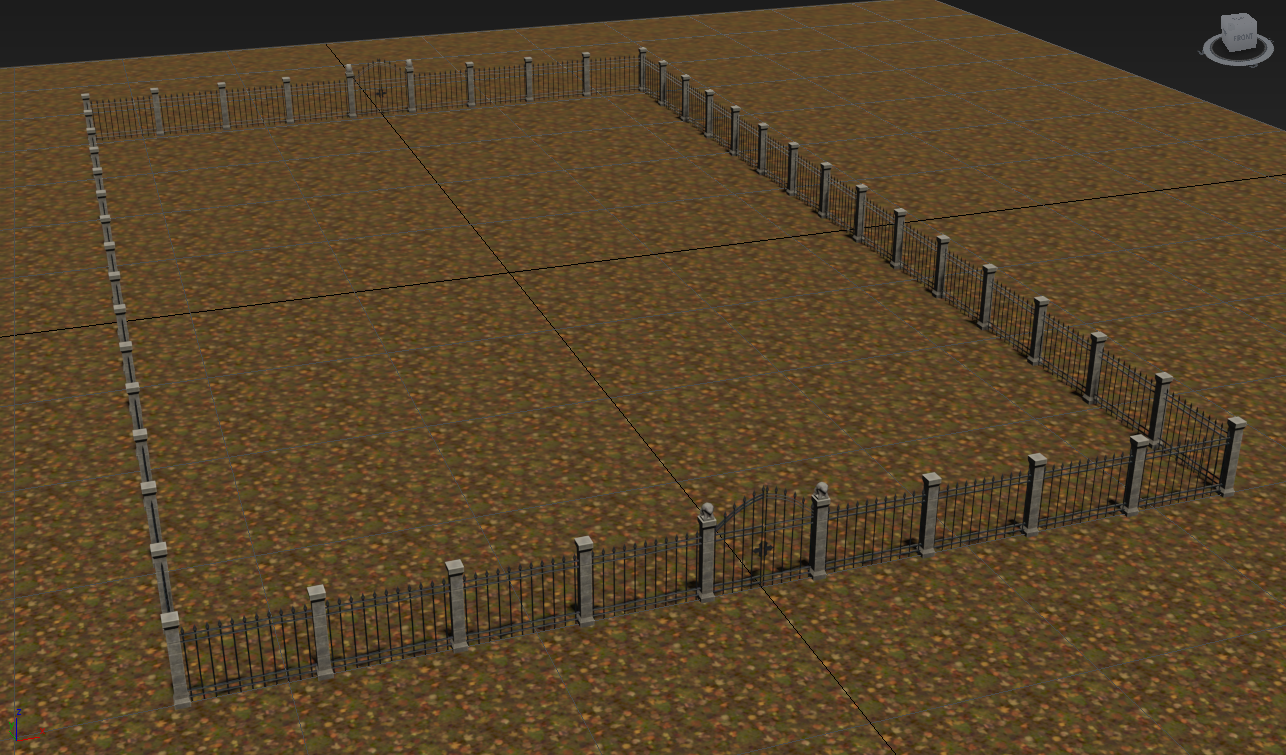 The initial 3D Studio Max scene
Then I exported the “Limits” and the ground as OBJ objects to my Game Engine and got the following result:
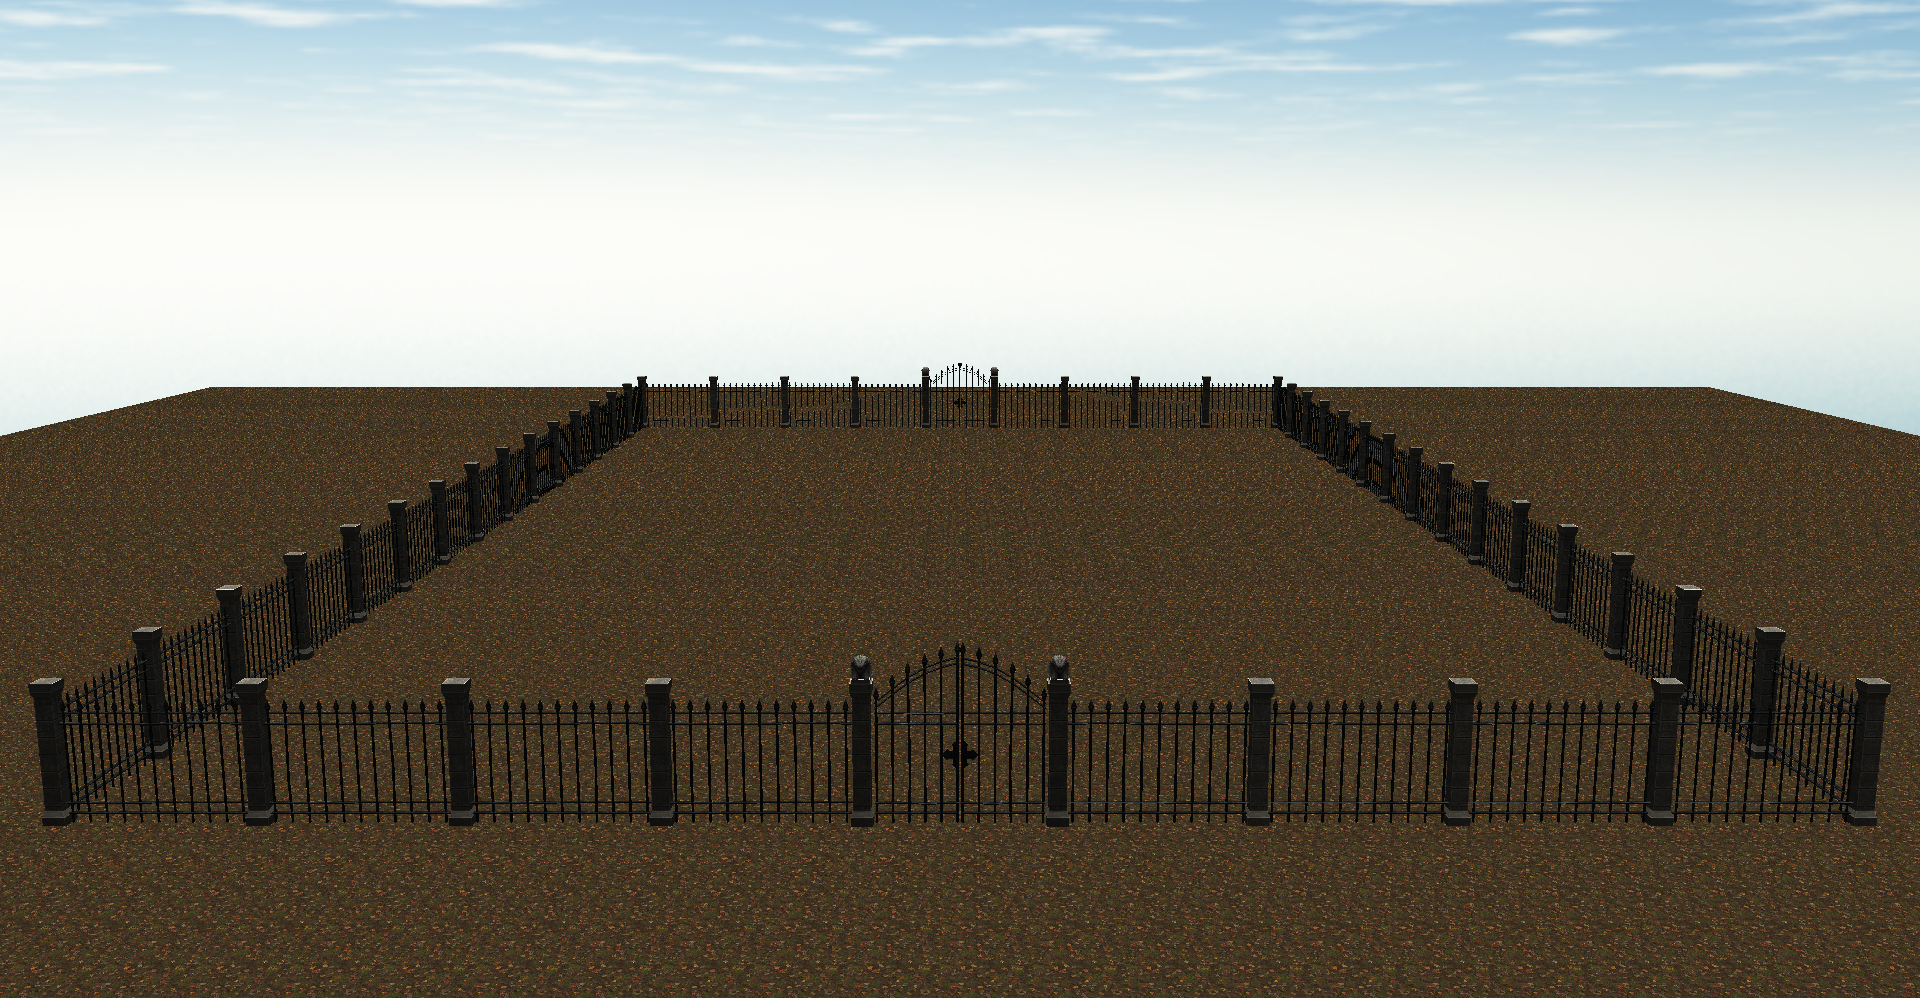 The initial scene in my Game Engine
Well, that looks nothing like this:
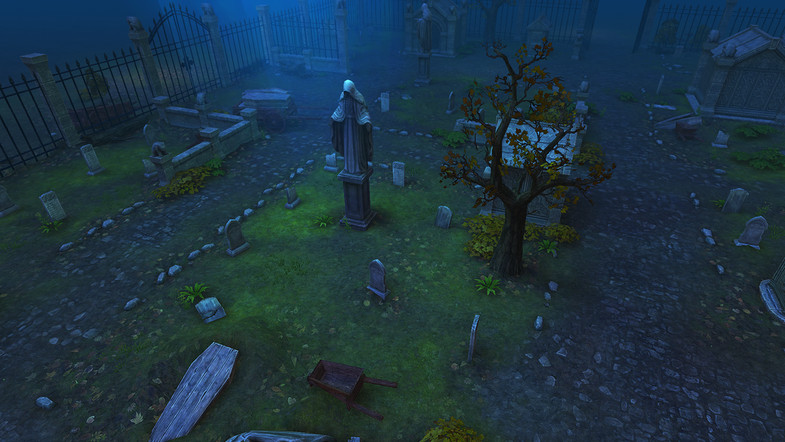
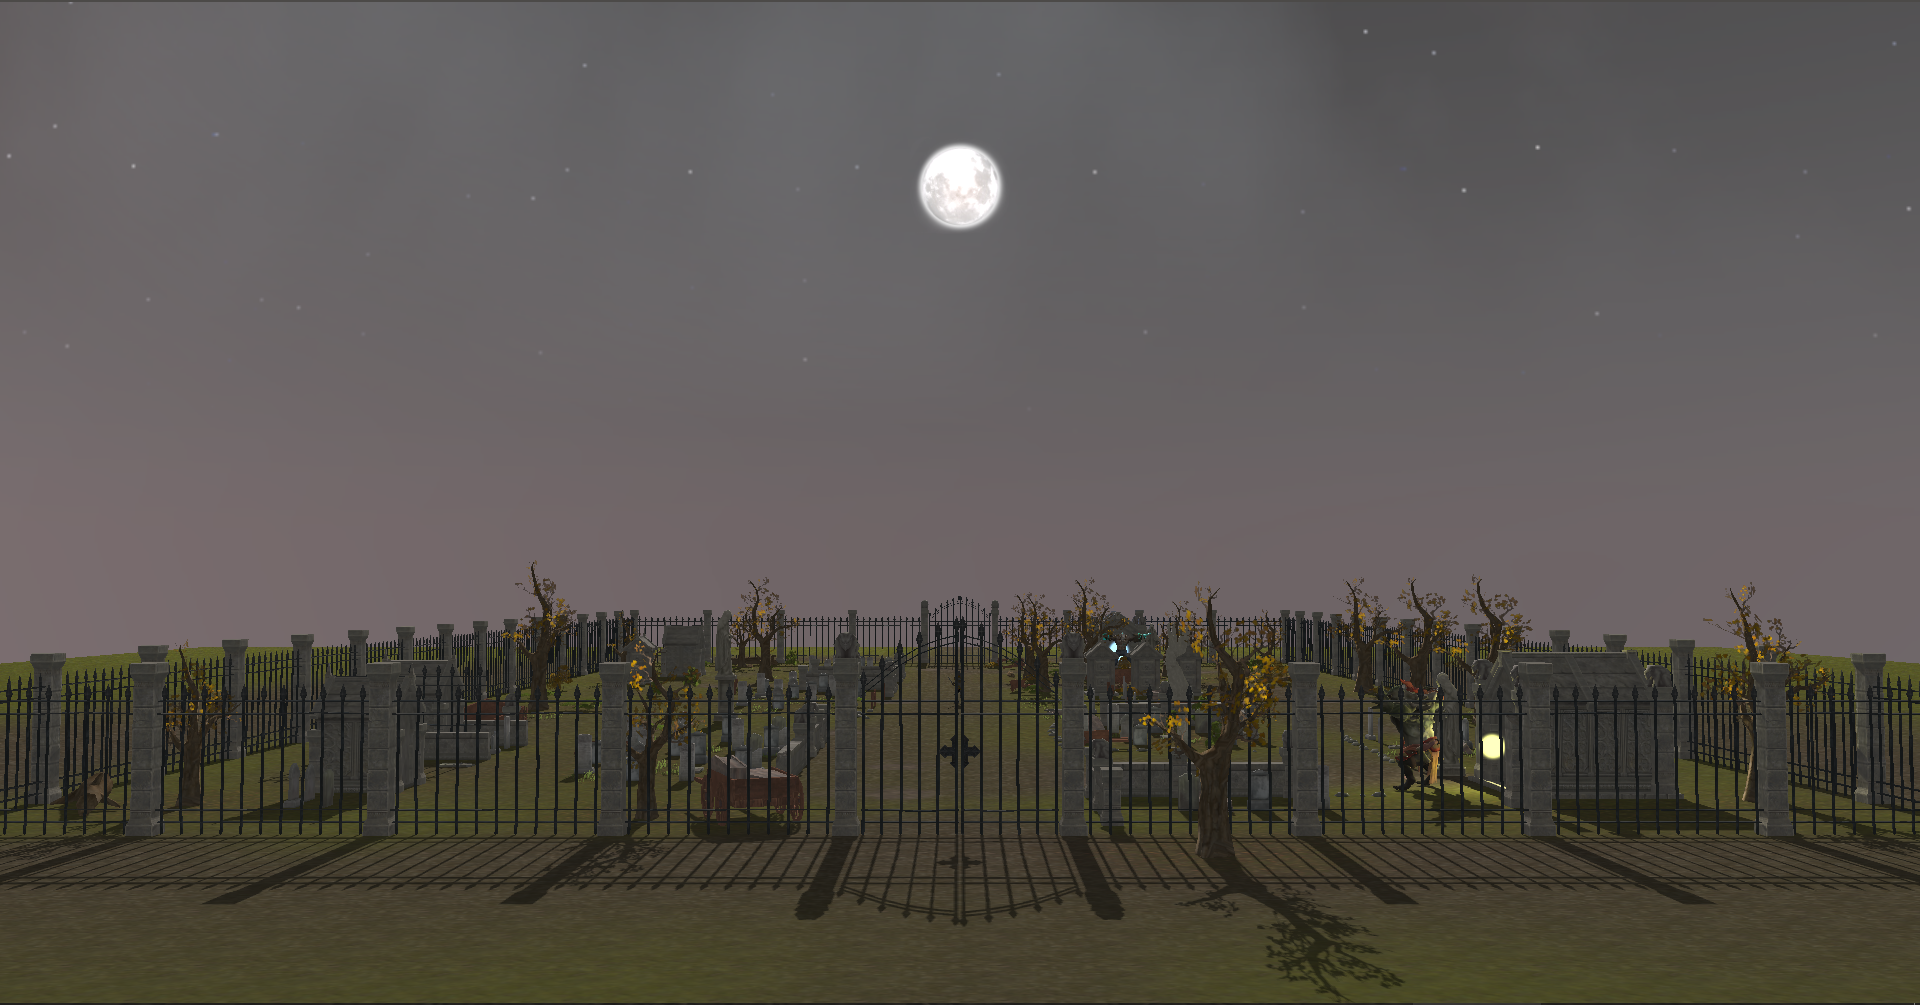 The final scene in my Game Engine (with FOG off)
So, besides putting all the assets in the scene, many things still had to be done in the Game Engine to accomplish an acceptable looking game scene.
The Characters and Character Animations
Although this was not on my technical list too, mainly because most of the animation system was already implemented at this point in my Engine, I think it does worth it to explain the origin of the characters used in my presentation. Again, this is a matter of finding good assets. But here, there is an incredible handy and (still) free resource website called Mixamo that has dozens of rigged models and thousands of characters animations.
At first, I was thinking about a Night Zombie theme (and there is a lot of zombie models and animations there), but I really liked this Knight:
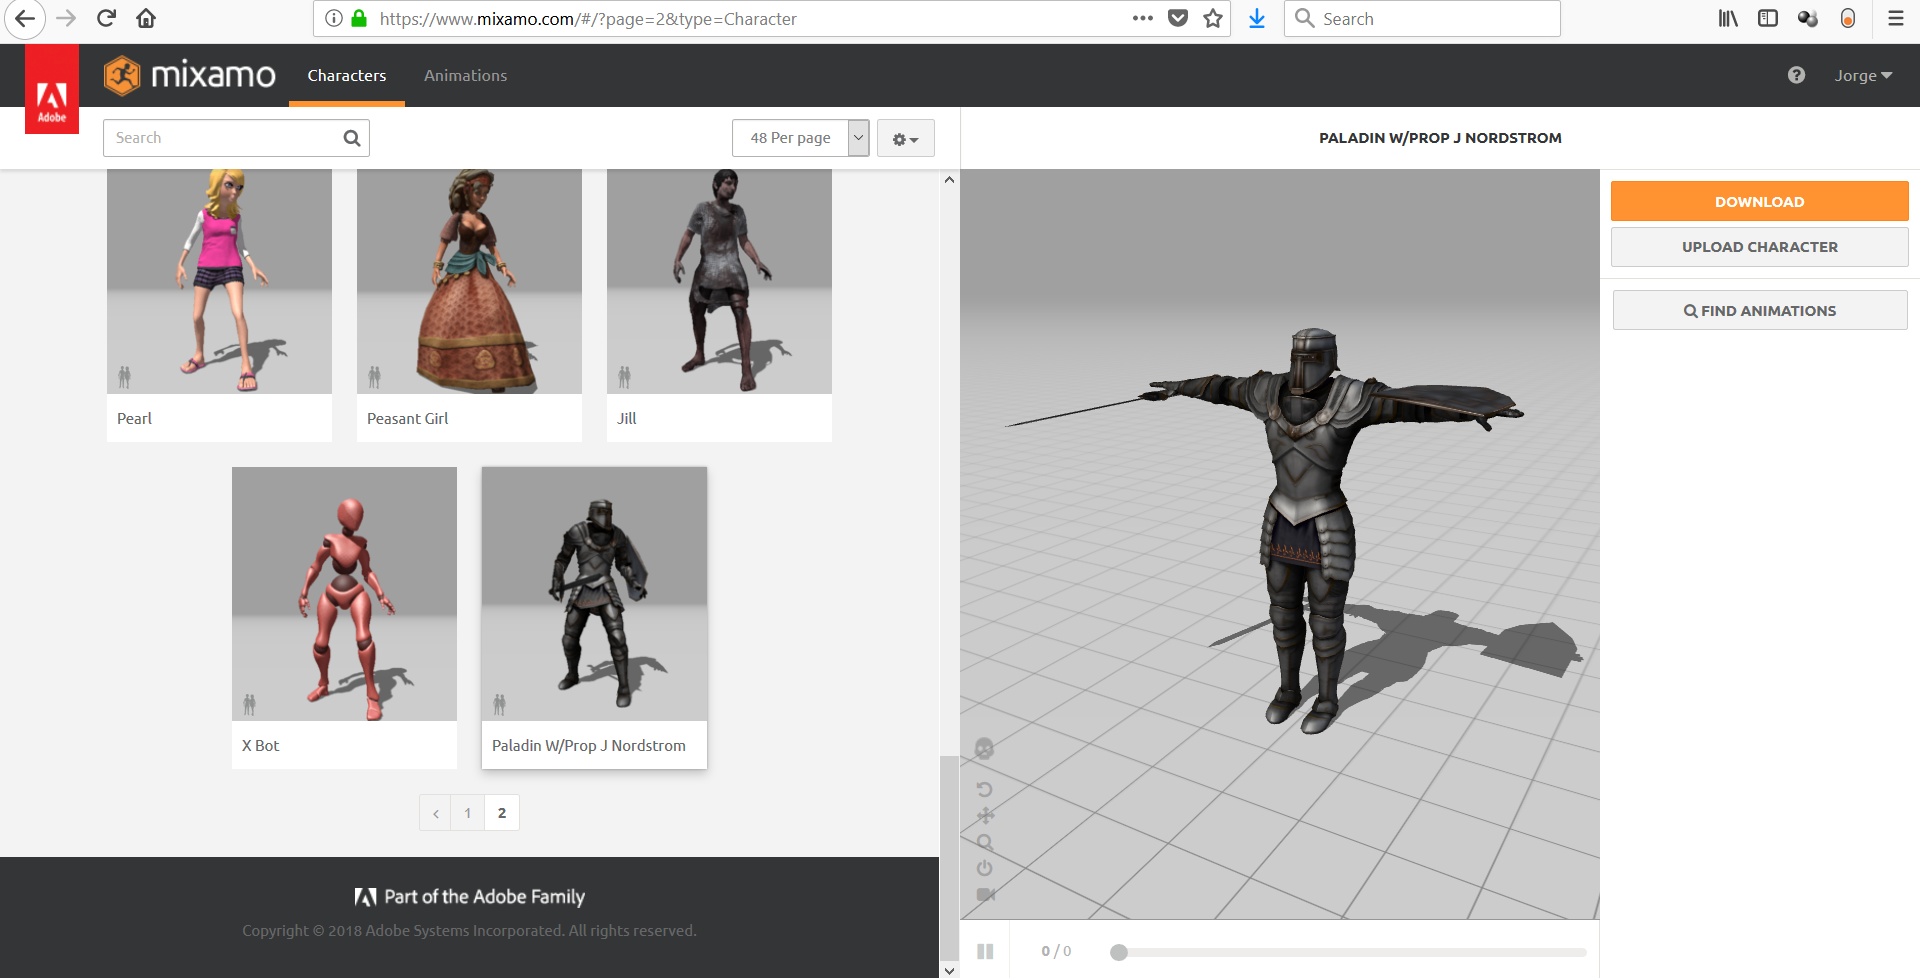 Knight model at Mixamo
If you already have your model, you can even upload it there and look for the animations you want. There I also found the other two “monsters” and their animations to use in my project later one. Their assets are fantastic.
After some work finding a set of animation for him, I manage to put it all in the Engine:
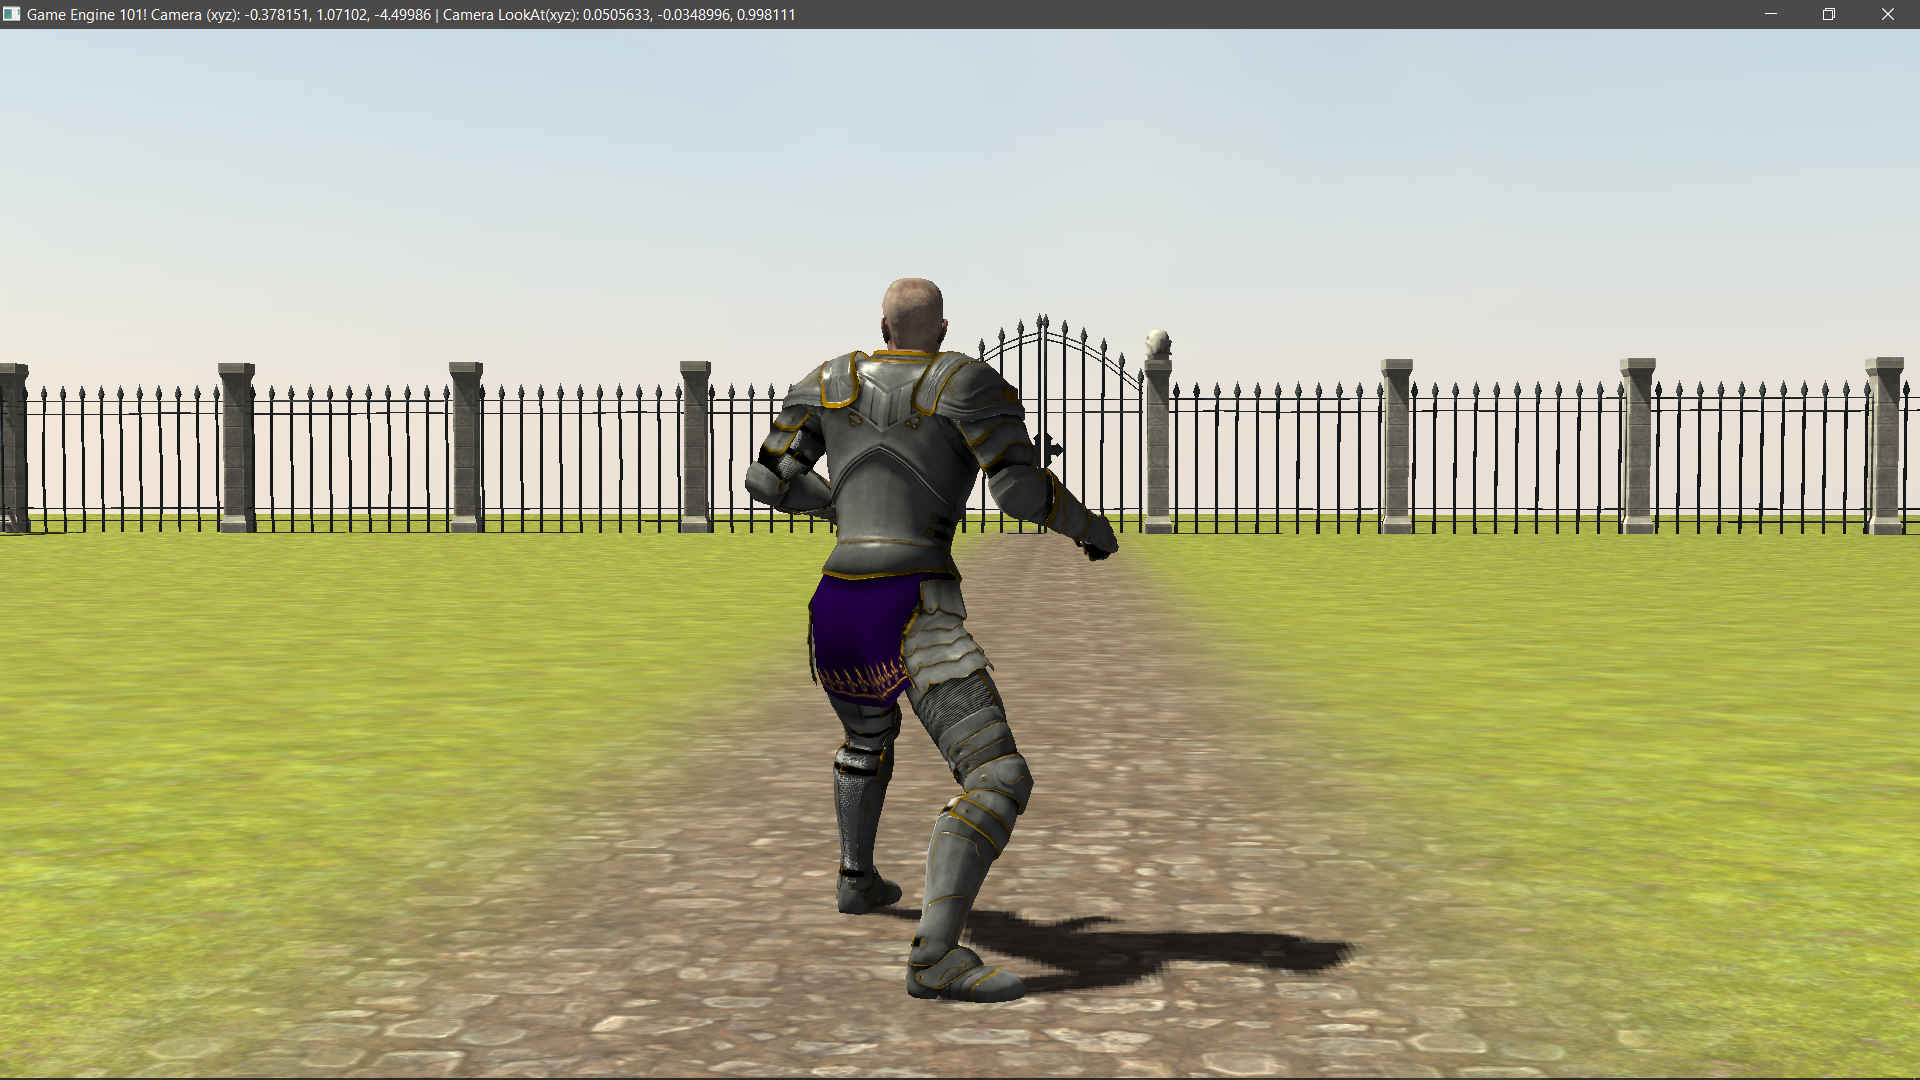
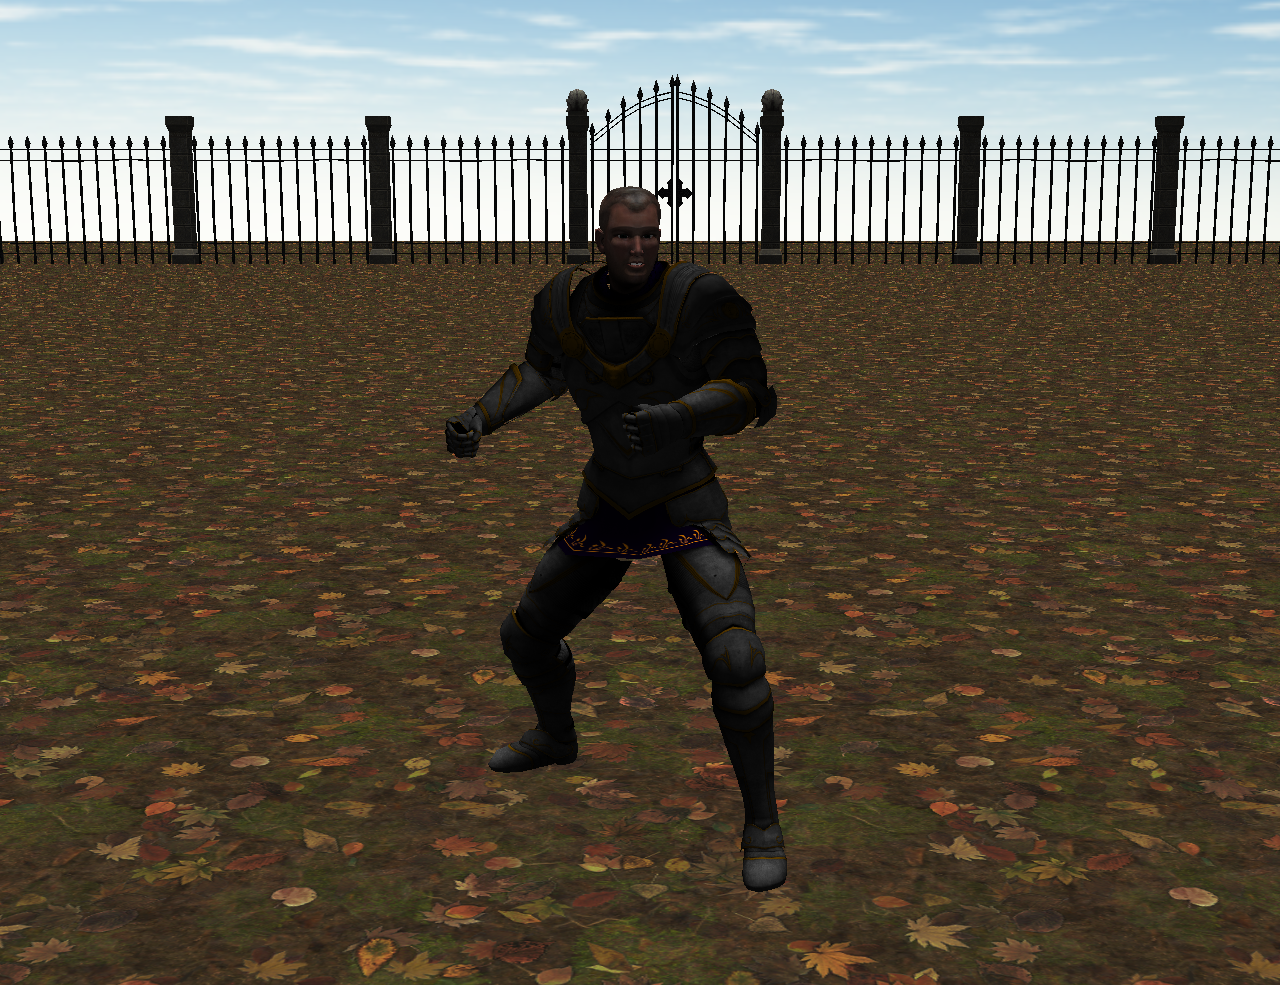 Knight model in my Game Engine
However, all the props were gone, as they were also different meshes and at that point my Engine only loaded the first mesh in the model (Something fixed later on of course). Also, I had different plans for the props: attach them and make them fall by the Bullet Physics Engine (integrated in my Engine).
Ok, time to move to my first “Technical Aspect” of the list…
Day/Night Cycle and Environment Control
I thought of doing a full Day/Night cycle since the beginning, because I wanted to do some kind of outside scene and also the idea looked pretty feasible to me. For that I would initially need:
- Different Skyboxes to blend their colours between each other, according the to the time of the day
- Different lights (one for the sun and one for the moon) changing their position according to the time of the day
- Change the intensity and also the colours of the lights also according to the time of the day
Thus, I created a class to handle all the environment stuff: cEnvironment. The initial results can be seen in this little video:
There are more pieces for the Day/Night control like controlling the FOG, change the position for the dummy Sun and Moon textures (implemented down the row), change the position of the camera for the shadows according to the position of the lights etc. However, the fundamentals for the cEnvironment class stayed pretty much the same during the developer process.
Shadows
Having a Day/Night cycle like that without shadows would look awful at the end. Thus, the shadow system became a Must in my project. Also, it had to be dynamic as well.
First of all, let me briefly describe the technique used for the shadowing in my Engine, called Shadow Mapping:
- Render the scene to a Frame Buffer using an Orthographic projection and only the Depth Buffer
- During this render, discard values for alpha textures that are below a certain threshold, like 0.5. That way we will also have transparent textures casting shadows nicely
- During the regular light calculation for the scene, using the depth buffer and compare the fragment to see if it has a Z value greater than what we have in the depth buffer. If yes, the fragment is in shadow and should not receive the light calculation
- Control the position of the render’s camera according to the source of the light (Sun or Moon)
Other sub-steps are necessary, like converting the space coordinates to be able to find the right Z value or use PCF (Percentage Closer Filter) to make the shadows look smoother. There are some very good tutorials about shadowing on the Internet if you want to take a closer look. I especially liked this one.
After implementing the shadowing system, the Engine looked like this:
 Shadows implemented
You can also see that I had some minor improvements there, like a better specular calculation, mipmaps, bump maps, dummies for the Sun and the Moon (see the next video) and even the multilayer texture (the next topic). Those “little additions” really made the final project much more visually appealing.
Here a short video at that stage of development:
Multilayer texturing
Multilayer texturing is a technique that uses different textures in only one object and blend them all together using a different texture as a parameter. In the case of my Engine I needed two sorts of texture coordinates for the ground object:
- One is the regular texture coordinate where the texture repeat itself through the entire ground (that is only a simple square object)
- The other is the coordinates used by the overlay textures (that is a texture that will drive the blending values between all other textures)
To summarize, I had these four textures working together:
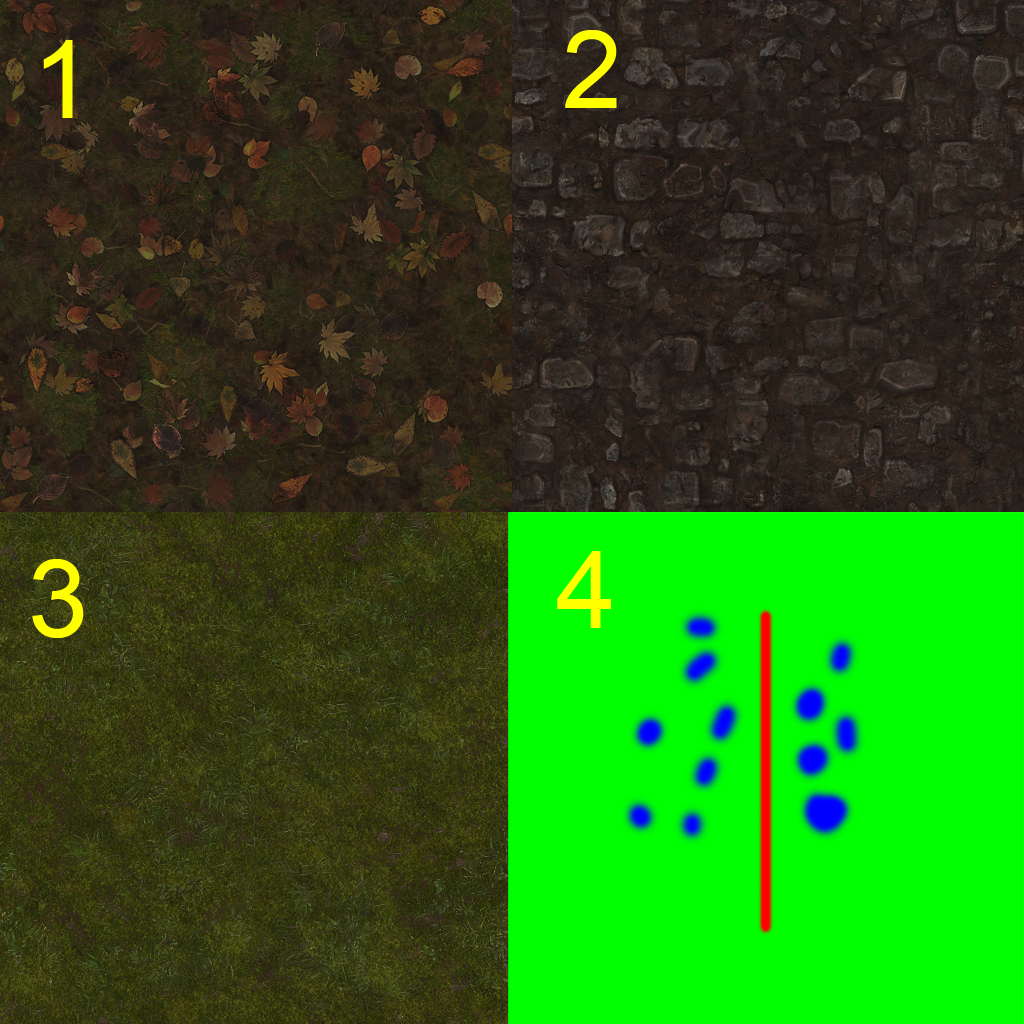 Multilayer textures
The texture number 4, through its colours, controls how much the other textures can appear in the final face of the object. Blue for the number 1 texture, Red for number 2 and Green for number 3. For this test you can see the results in this image:
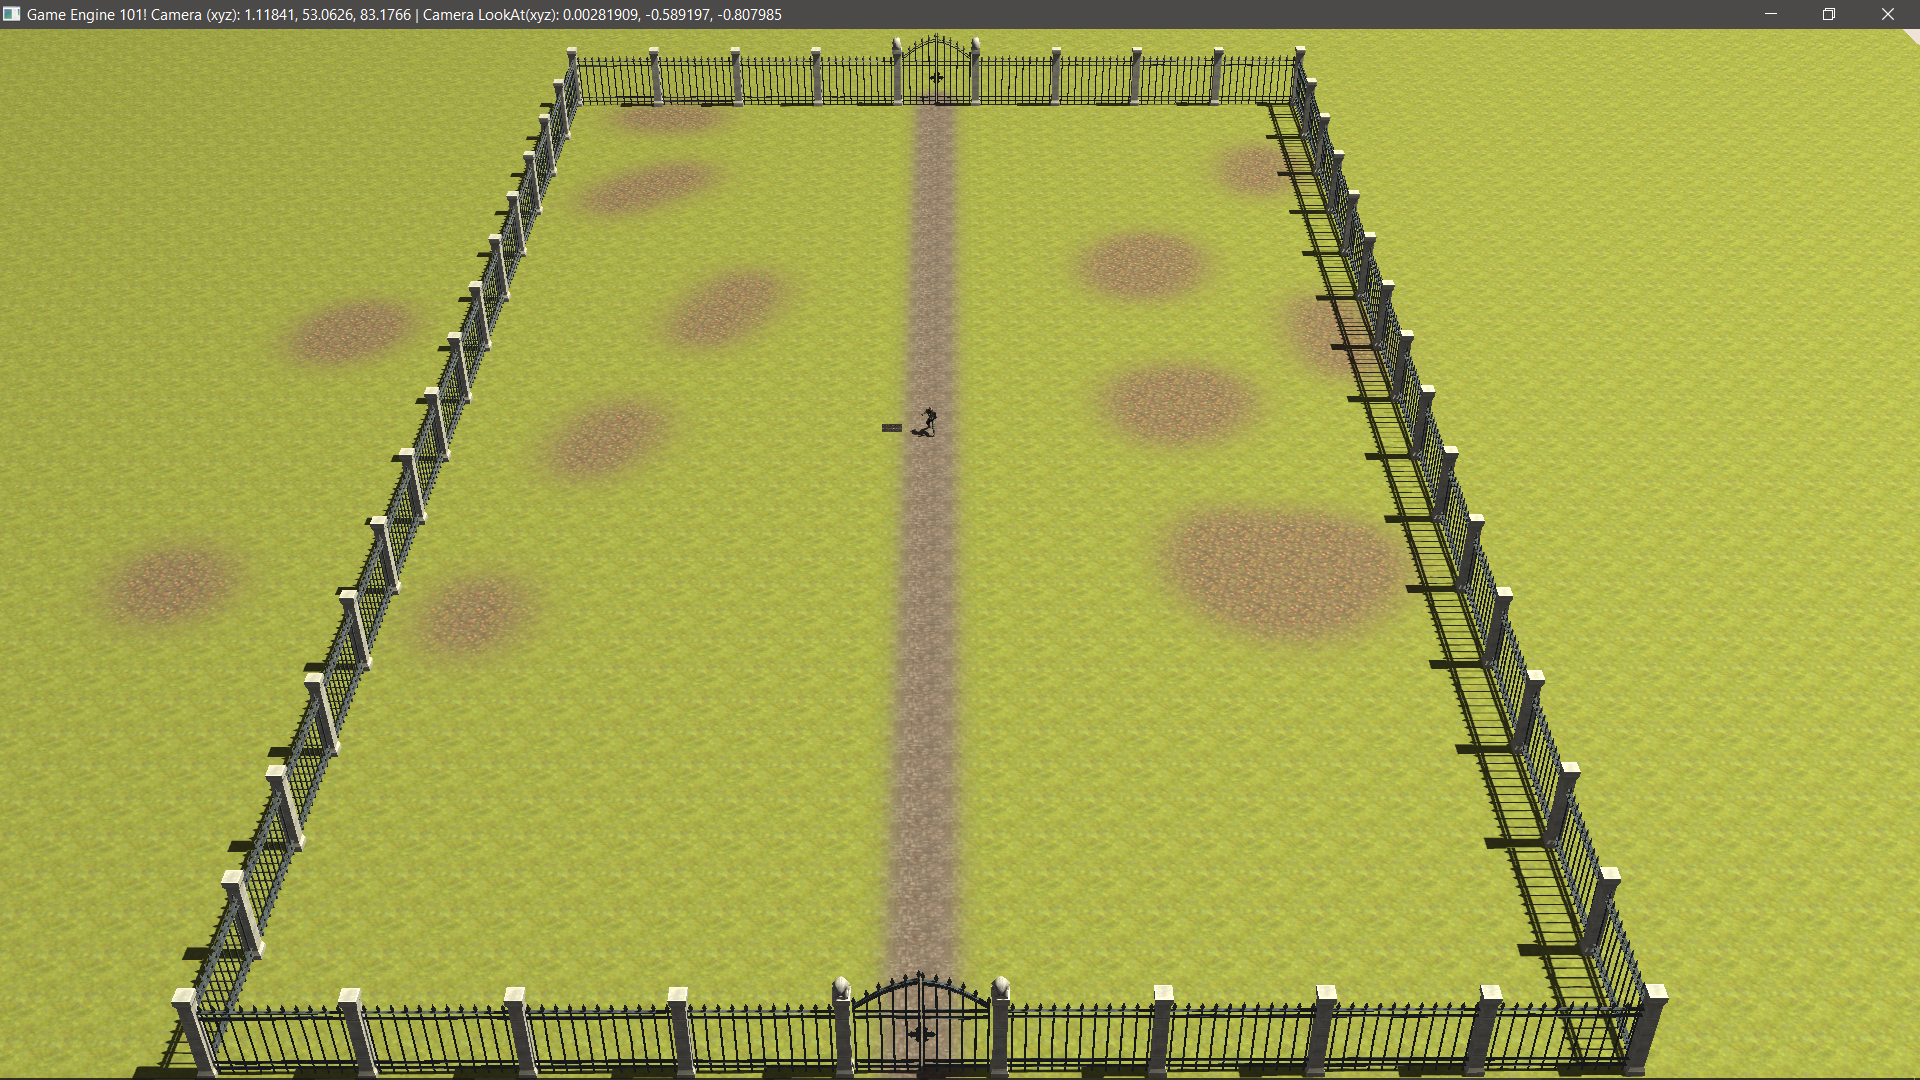 Multilayer texturing in the Game Engine
With some painting work and patience, the Overlay texture can make the scene look very good and realistic:
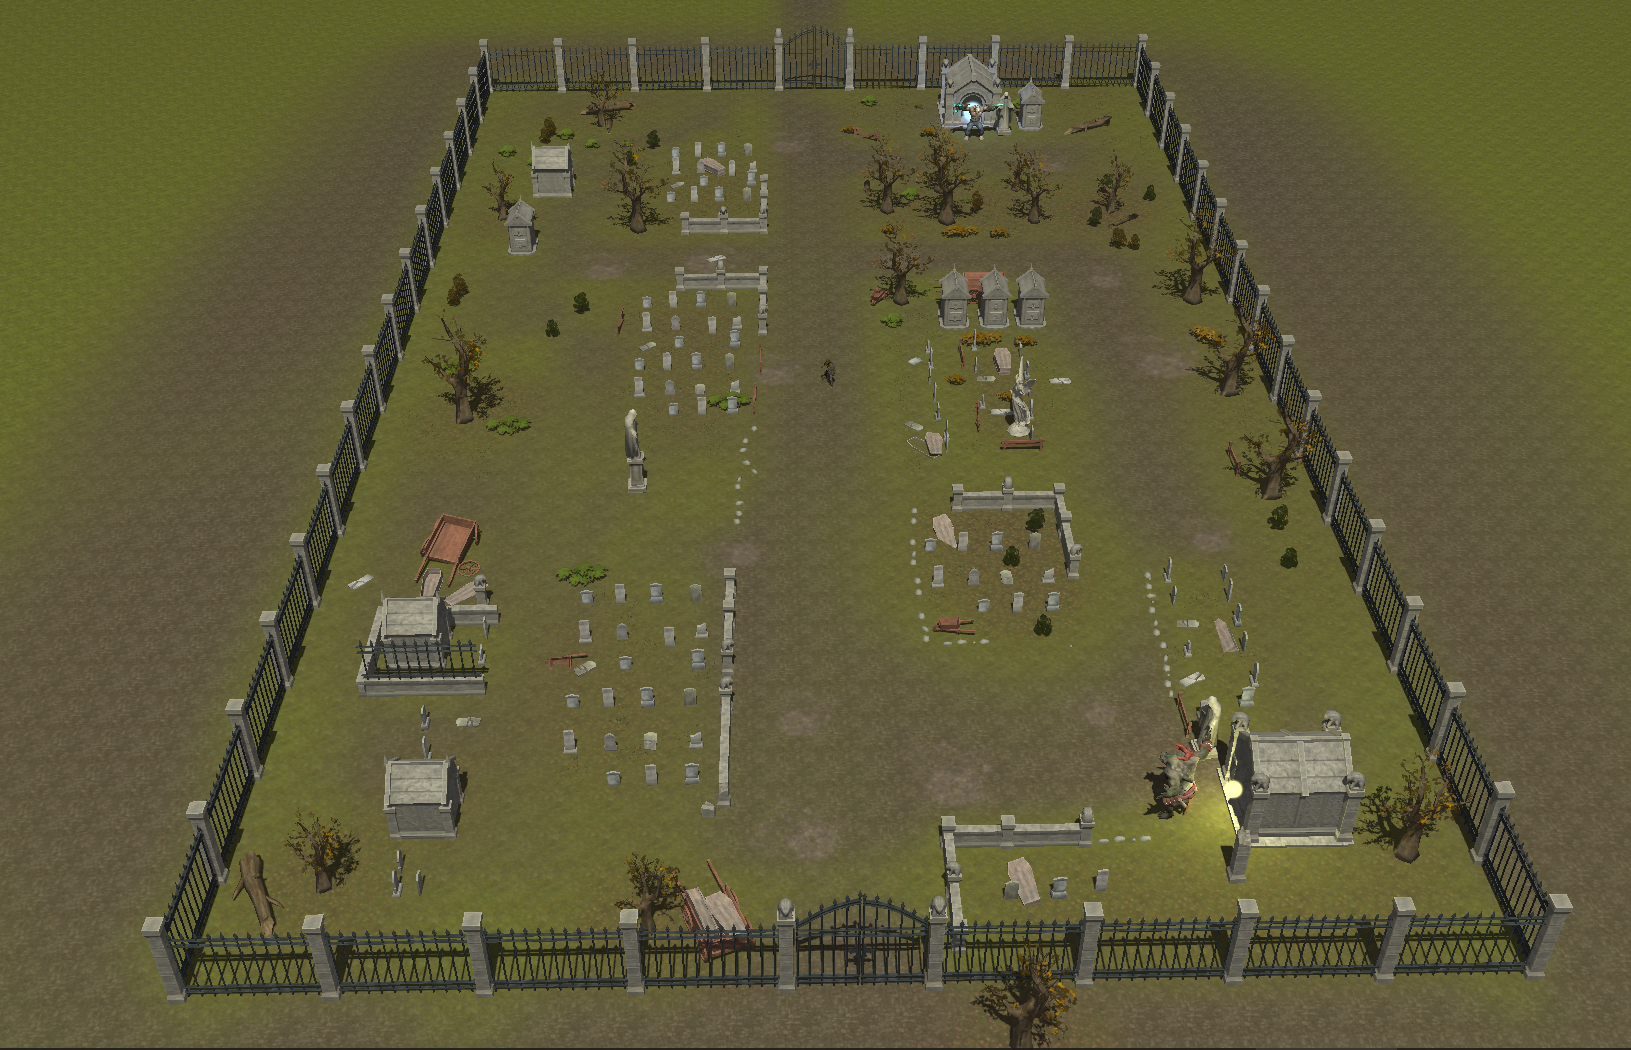 Multilayer texturing in the Game Engine - final results
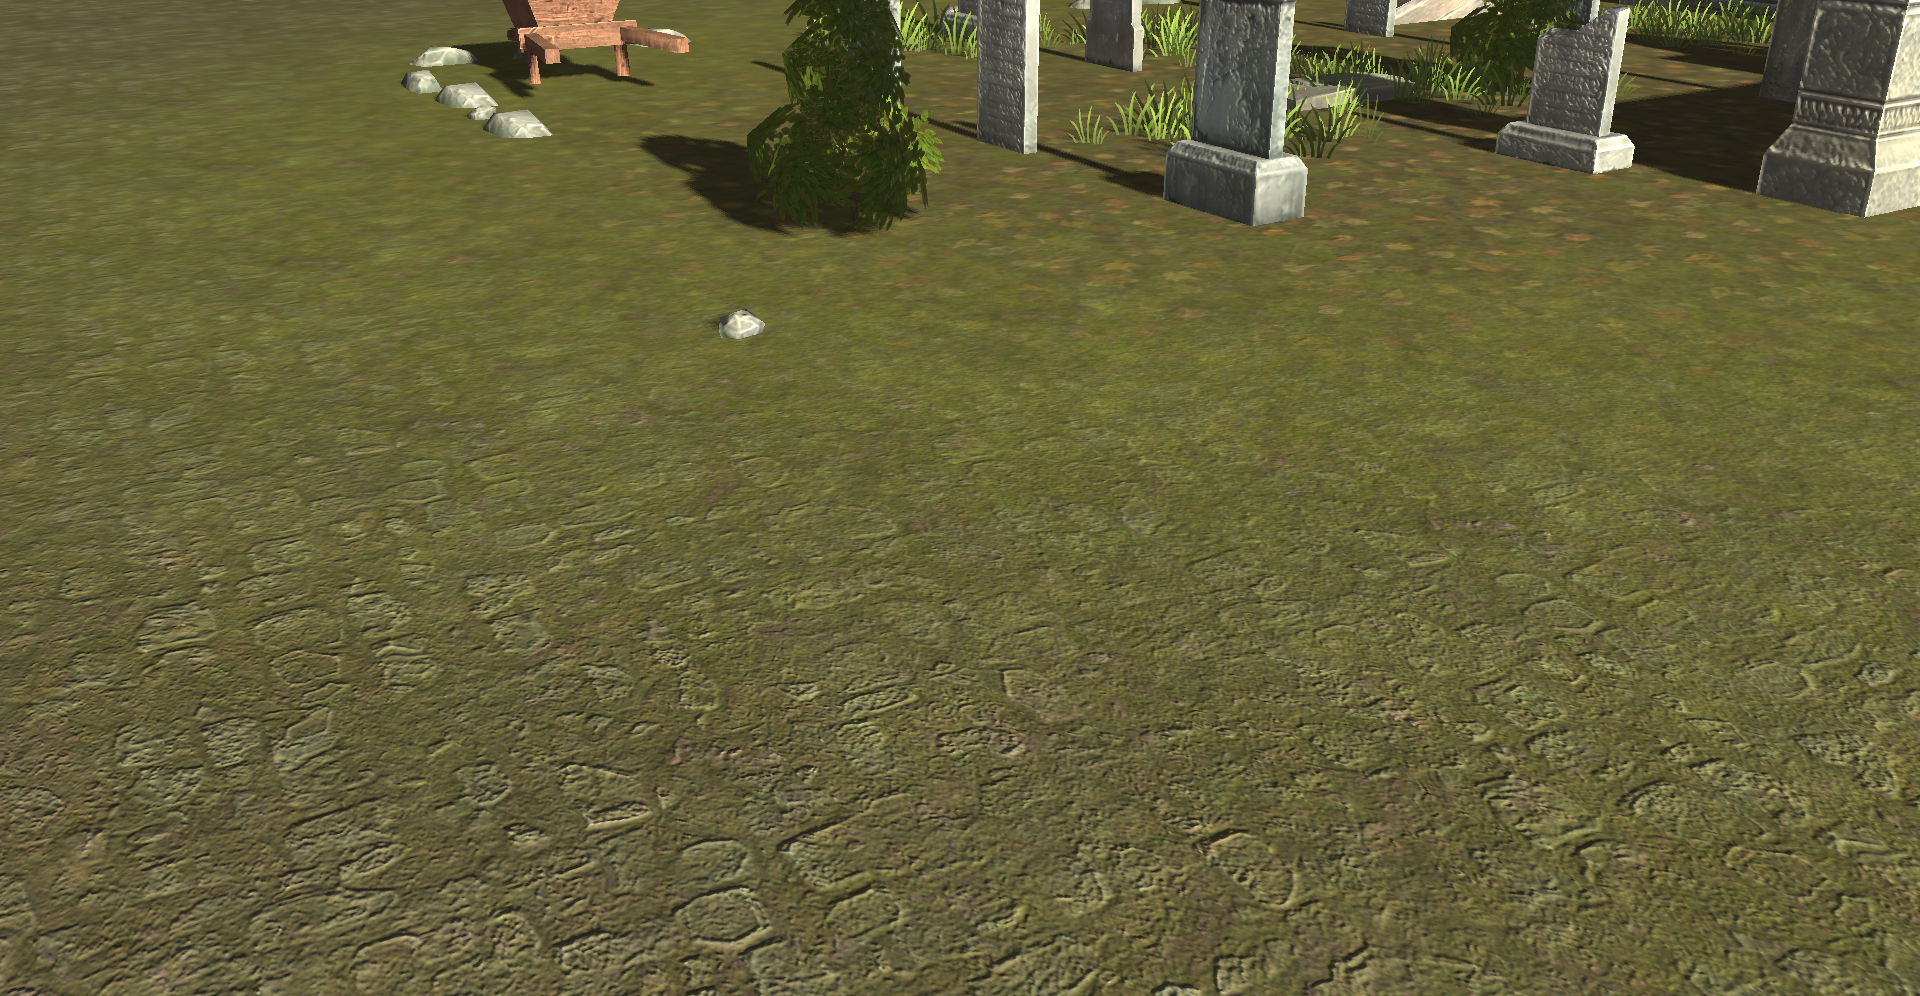 Multilayer texturing in the Game Engine - final results
I thought I could summarize my Game Jam in only one post, but it seems we are going to need another one for the rest of the Technical Aspects as this is already too big.
So, stay tuned for the next one soon.
Jorge Amengol.